Putting your new frame kit together and hanging your puzzle is easy! Your frame kit includes visual instructions, as well as a link to a video showing you the whole process. For those who prefer written instructions, please follow the steps below, which correspond to the instructions included with your kit.
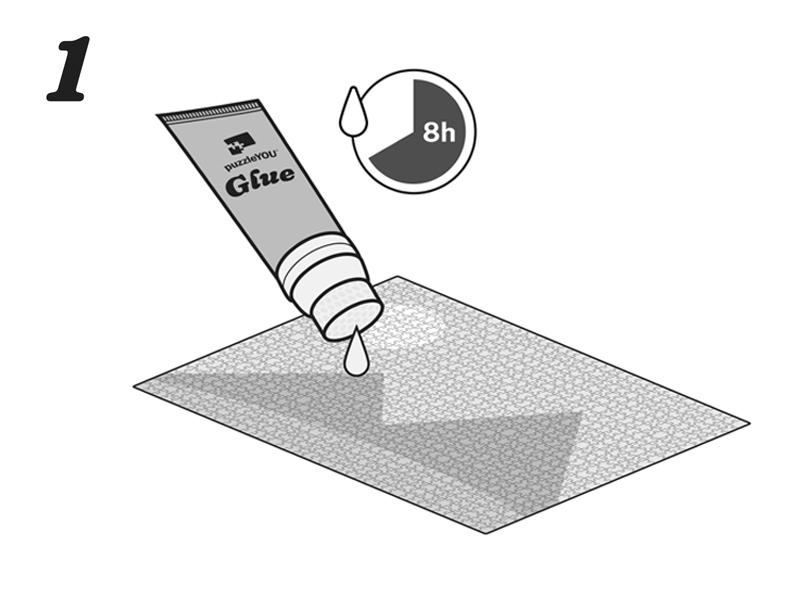
Apply the included glue to the front of your puzzle. You'll need to wait at least 8 hours for the glue to dry (though this can take longer). Please make sure the glue has dried completely before proceeding to the next step.
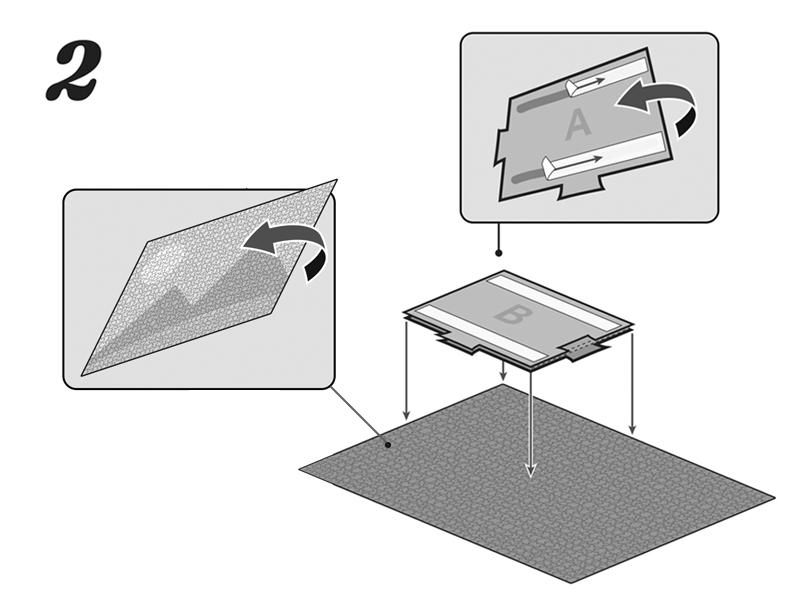
Once the glue has dried, flip your puzzle over so the back is facing up. Locate the lettered cardboard with adhesive strips in your kit. Remove the adhesive strips from the side labeled "A." Line up the edges of side "A" with the upper left corner of your puzzle (if your puzzle is vertical/portrait, rotate your puzzle so it's horizontal and continue to follow all instructions) and press to adhere.
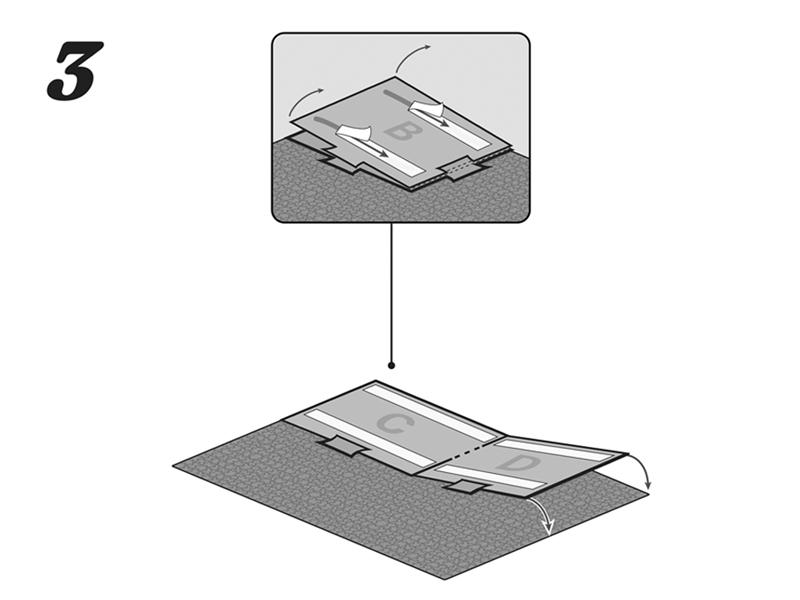
Side "B" should now be facing up. Remove the adhesive strips from side "B," fold it over to the upper right side of your puzzle, and press to adhere.
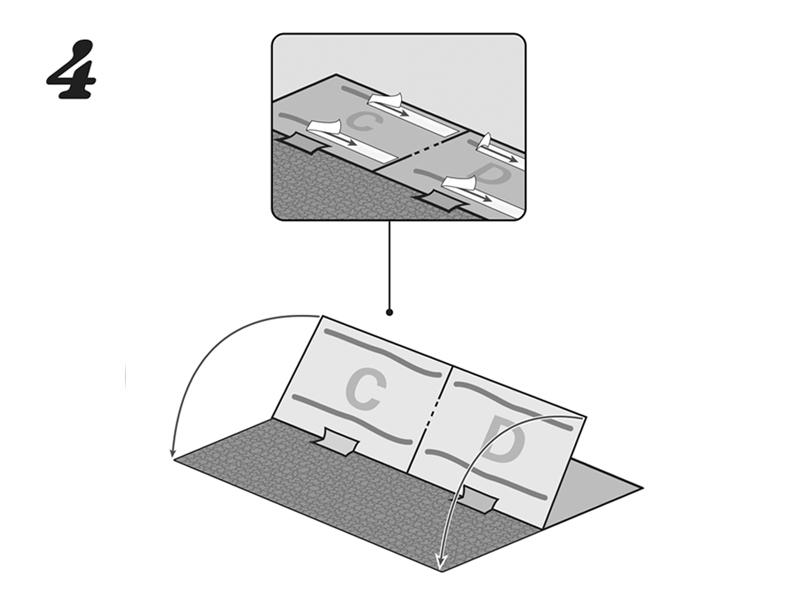
Side "C" and "D" should now be showing (don't worry if the letters are upside down!). Remove the adhesive strips from both "C" and "D," fold these over the lower half of your puzzle, and press to adhere.
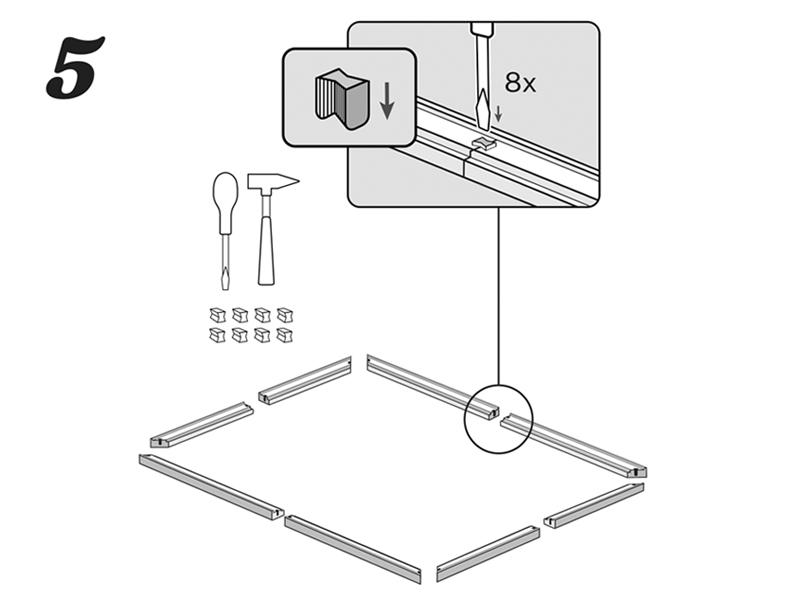
For this step, you'll need a screwdriver and a hammer. Locate the outer pieces of your frame in your kit, and arrange these pieces in the shape of the final frame. We recommend doing this first so that you don't accidentally connect pieces that shouldn't go together. Once your frame has been shaped, flip the frame pieces over and begin connecting them with the included dovetail connectors, which can be found in the small paper bag in your kit. To use the connectors, place each connector curved side down in the grooves between frame pieces. Then, hold the screwdriver over the connector, and use the hammer to tap the handle of the screwdriver to drive the dovetail connector in place.
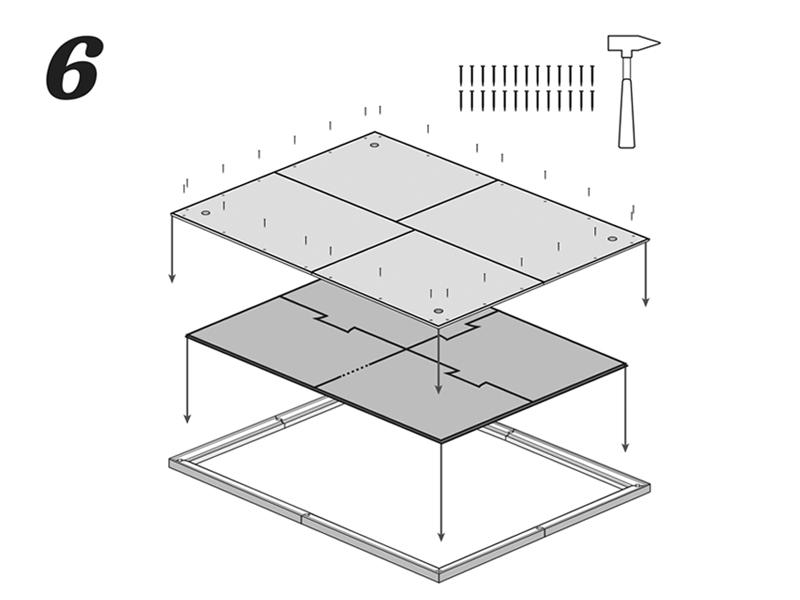
Place your puzzle with cardboard backing over your newly connected frame. Locate the hard backing board in your puzzle kit and position this over the back of the cardboard. You should have one longer and one shorter piece on each side, and the four holes should be in the four corners of your puzzle. Carefully remove the small finishing nails from the same paper bag that contained the dovetail connectors, and pound a nail into each small hole around the backing board to attach it to the outer frame.
Congratulations, you've successfully assembled and framed your puzzle!
Measure between the holes of your backing board to hang the finished piece on your wall. Some people like to apply a little chalk or pencil at those holes, and then press the frame against the wall to show them where to add nails/screws. We recommend using a level to ensure a straight finish.
©2026 puzzleYOUPrivacy PolicyLegal NoticeTerms & ConditionsReturn Policy
